Showing posts with label wooden. Show all posts

Saturday, August 10, 2013

My Very First Show in the U.S.

I know my friends, this is a bit late, but as the saying goes," Better Late than Never!!"
I recently put up my creations at a local show (exhibition).....
It was my very first exhibition after moving here in the U.S.....
I was very excited and nervous to put up an Indo-western fare, but the response I got was beyond my expectations....
People loved the colors and the fine handwork too....
I even did a pretty good business :D
A big Thank You to my dear customers, and tons of  thanks to my dearest hubby and my friends who stood by me the whole day....Love you guys!!!!
Here are some pictures for you.....
Exhibition Table
 Here are some Magnets that I made......They were a big hit!!

Glass Magnets
These are some of the Thank you cards :)

Thank You Cards
Thank You Cards
These are some of my handmade earrings.....Thanks to my dear sis-in-law for the beads :)

Handmade earrings

This is one of the many hand painted totes (One-stroke Painting) on display.....

One stroke painting Tote
This is one of the Coaster sets I made.....Sold a few :)

Tile Coasters

I even made some handmade Floating Diyas (which people loved and bought), Wooden decoupage trays (my friend bought one and she is loving it!!) , Meenakari mirrors, Decoupaged mirrors, Acrylic on Canvas paintings, paintings on wood and handmade bookmarks too.
I will upload them in the upcoming posts...... 

And this is a sneak preview of my next post coming very soon!!......Keep watching the blog.....

Meenakari- Enamel Work 
If you wish to buy any of this gorgeous stuff, or even just wanna talk about it, leave me a comment below or email me at amber.art@2012.com
I'll be glad to answer!!!
Thanks for visiting :) and come again for more.....


Monday, January 28, 2013

DIY Butterfly Wall Hanging


Hello there......
With the harsh winter forcing us to coop up in our houses, I guess the creative energy kinda takes 
over.....That goes for me....hope it does for you too :)
Today I made this Butterfly Wall Hanging......
You must be thinking why I keep making butterflies all the time ???
Well, what can I say???.....Butterflies are one of my favorites!!!!

DIY Butterfly Wall Hanging

Anyhow, I used these wooden butterfly cut-outs.....You can find them easily 
at any Craft store.......They were pretty smooth, so I didn't sand them.....
And also, I wanted that slightly grainy look on the butterfly's wings.......

Wooden Butterfly Cut- outs

Then, I painted a pair of blue butterflies, as shown below......
Yup, Blue is my favorite color......It is very dominant in most of my works......

Painted Blue Butterfly

When the butterflies were nice and dry, I assembled together the things that 
I would require to make this Wall hanging.......
Shown in the picture are:
  • Pair of Painted Blue Butterflies
  • Medium and small circle mirrors
  • Green Ribbon
  • Key Ring and
  • Glue gun


Materials Required

I used the glue gun to fix the butterflies, mirrors and the key ring on the ribbon......
The final assembly looked like this......

Wall Hanging

I thought it needed something more ......just a wee bit more, to make it perfect......
So, I used my favorite stuff....3D outliner (Puffy paint)........
I put tiny dots of blue along the edge of the mirrors......and that just did it!!!

Mirror

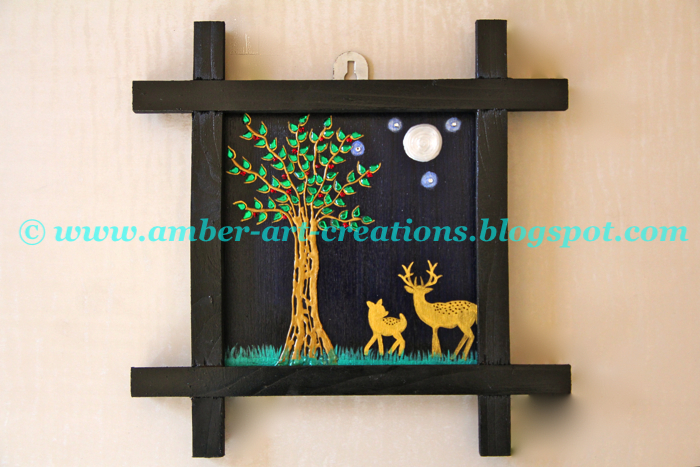
Here's how the wall hanging looks on the wall, next to my 'Blossom Branch' Painting.....
You can view the painting here......

Butterfly Wall Hanging

 This was before hanging it up......

DIY Wall Hanging

Hope you liked it.......
Comment below to let me know you were here and liked this......
Come back again for more.....Till then, Happy Crafting !!!

Thursday, August 9, 2012

Fancy Key-holder

Key-holder

Today I will show you another key holder I made recently.......
I really love making these :)
This one especially is one of my favorites.....
The design is really simple, but the final product turned out very impressive....
Pardon the image quality.....It doesn't really do justice to the real thing :(
However, let me tell you how I made this...... 
I painted a wooden block 4"x 6" in acrylic color- black.
When it dried, I made some squiggly lines for the branches with my favorite:  3D outliner- gold......
Then I made some leaf outlines with the same outliner along the branches......
I finally stuck red teardrop shaped rhinestones inside the leaf outlines......
Thus, my fancy key- holder was ready......
This was sold the very next day :))
Hope you liked it.....
You can see the other 3D key holders I made, in my previous posts, Happy Home Key Holder and Under the Sea key holder
Have Fun and Thanks for visiting :)

Tuesday, May 8, 2012

DIY 3D Photo Frames

Photo Frames
Hi....
Today I would like to share with you the 3D Photo Frames I made with my son for
gifting his teachers on the occasion of  'Teachers Appreciation Week'  :)
We bought some blank wooden frames by Plaid.......
My son painted the frames with acrylic color- yellow.......
He did two coats of paint and, we let the frames dry for an hour......
We had also bought wooden cut-outs of a sun and a ladybird......
We glued the sun on one frame and the ladybird on the other.....
We even glued some googly eyes on the sun and the ladybird....... :D
Then my son stuck foam stickers of flowers and butterflies on the frame......
I gave it the finishing touches with 3D glitter for the butterfly trails......
And......Our Frames were ready......
My son was very happy to make such lovely frames on his own.....
And, I was so proud of him !!!
The best part was that, his teachers adored their gift as well :)

Sun Photo Frame
Ladybird Photo Frame
You can leave a comment here to let me know if you liked the 3D Photo Frames.......


Thursday, April 26, 2012

"Happy Home"- 3D Key Holder

3D Key Holder

Hi....This is another key holder commission piece I made a few days back......
This is a 3D key Holder and I call it "Happy Home"......
I made this design on a Wooden Ply 4"x7", using epoxy / M-seal.....
The details on how to make this can be found in my earlier post: 
I think it turned out pretty cute.....What do you think ???
Do leave a comment to let me know how you feel about it ....
Have Fun :)
And Thanks for Visiting .....


Friday, April 20, 2012

DIY Recycle Craft- Pen and Card Holder

Pen and Card Holder

Welcome to my latest post on Recycle Craft......
I have made a Pen and Card Holder by recycling toilet roll tube, cardboard and a scrap piece of wood......
I prepared the base by sanding the wooden piece......
Then, I glued the tube on the wooden piece using a hot gun......


I cut two cardboard semicircles and glued them on the wood as a card holder....
I also used PVA glue to  create texture on the roll and the cardboard and left it to dry.....


You can see the initial assembly in the picture below....

Recycle Craft
After everything was nice and dry, I painted the whole thing with acrylic color- black......
When the paint was dry, I used 3D outliners to create some wavy string designs and added a few diamantes for some added glitter....
I also dusted some golden powder on the whole piece to give it an antique look....
To finish the borders I used some braided golden lace.....
Finally, I gave it two coats of spray varnish for a glossy finish.....and it was ready!!
This Pen and Card Holder now sits on my hubby's desk :)

Recycle Craft


Do leave a comment, to let me know if you like this craft.....
Have fun, and.....Recycle !!


Thursday, April 5, 2012

"Under the sea"- 3D Key holder

3D Key Holder


Hi and welcome to my post on how I made this "Under the Sea" key holder....
This was a completely hand-moulded, made-to-order piece for my cousin......
I used a wooden piece 3x6" in size, as the base for this key holder.....
I painted the base with acrylic colors in shades of blue and left it to dry.......
Then I hand-moulded epoxy to make the fishes, shells, plants, turtle, octopus, starfish and 
the bubbles.......
After arranging the creatures and the foliage, I moulded some epoxy pebbles for the 
base and some epoxy borders for the top corners......
Then came the fun part.....coloring !!!
I used bright acrylic colors for all the creatures....I wanted them to look happy!!
Then I added some 3D glitter for the waves and the design was complete.....
Lastly I added some hooks to hang the keys....after all thats what it was for ;)
It turned out pretty cute, and my cousin absolutely loved it !!!
Thank you for reading, and do let me know if you liked it .... :)


Saturday, March 10, 2012

Bride on a Box !!!

Bride on a Box


Hi and welcome again....
Today i would like to share with you how i made this bride on a jewellery box ....
Actually this was a wooden perfume box that i upscaled into a jewellery box and gifted it to my sister during her wedding...this was part of her "Rukhwat" or the bridal display of gifts from the mother's side....
The theme blended quite well with her wedding.....
First i sanded the box to make it smooth and then painted it all over with acrylic color- black....Then i got out my pack of air drying clay and started moulding the bride part by part over the box itself...When she was complete, i left her to dry for a day......I was too tired after all the effort, so while she rested i rested too!!
Next day, with renewed zeal i got back to work on the bride again.....I wanted the bride to look happy, so i chose all the bright acrylic colors for her clothes.....I painted her part by part and let her dry for a few hours....Then i took out my 3d outliners and gave detailing to her outfit....Finally i painted her face, hands and feet and gave facial features for that smiling bridal face.....This coy and dressed up bride sure made my sis smile!!!
Last but not the least i put a satin lining inside the box to make soft interiors....After all the box was meant to store jewelry!!


Tuesday, March 6, 2012

DIY Artsy Mixed Media - Deer Family

Mixed Media
Hi, today i'll show you the artwork i created for a friend, for her housewarming. 
This is mixed media on a wooden ply 6 inches by 6 inches in a wooden frame.


Deer Family
 I started by painting the wooden frame with acrylic color- black and kept it to dry.......
In the meanwhile, i sanded the base and painted it with acrylic colors- blue and black.
I made the tree with 3D outliner- gold and the leaves with rhinestones .
Last i painted the deer silhouettes with acrylic color- gold.
The last step was to assemble the base in the frame and voila!! a beautiful piece was ready to gift....
I just loved the way it turned out and my friend loved it too!!!
You can leave a comment below to let me know if you liked it too.....
I can also make this for a custom order....
Email me at amber.art2012@gmail.com if you want one :)
Thanks for visiting and come back soon for more!!!